Creating a colour swatch variant picker with Shopify


Table of contents
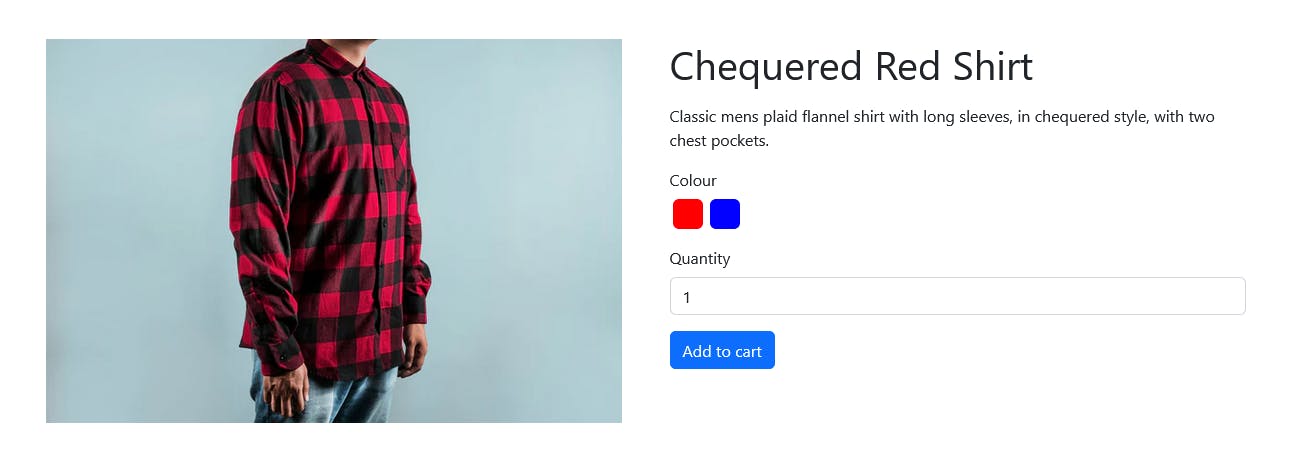
In this quick tutorial, I will show you how to create a colour swatch in Shopify.
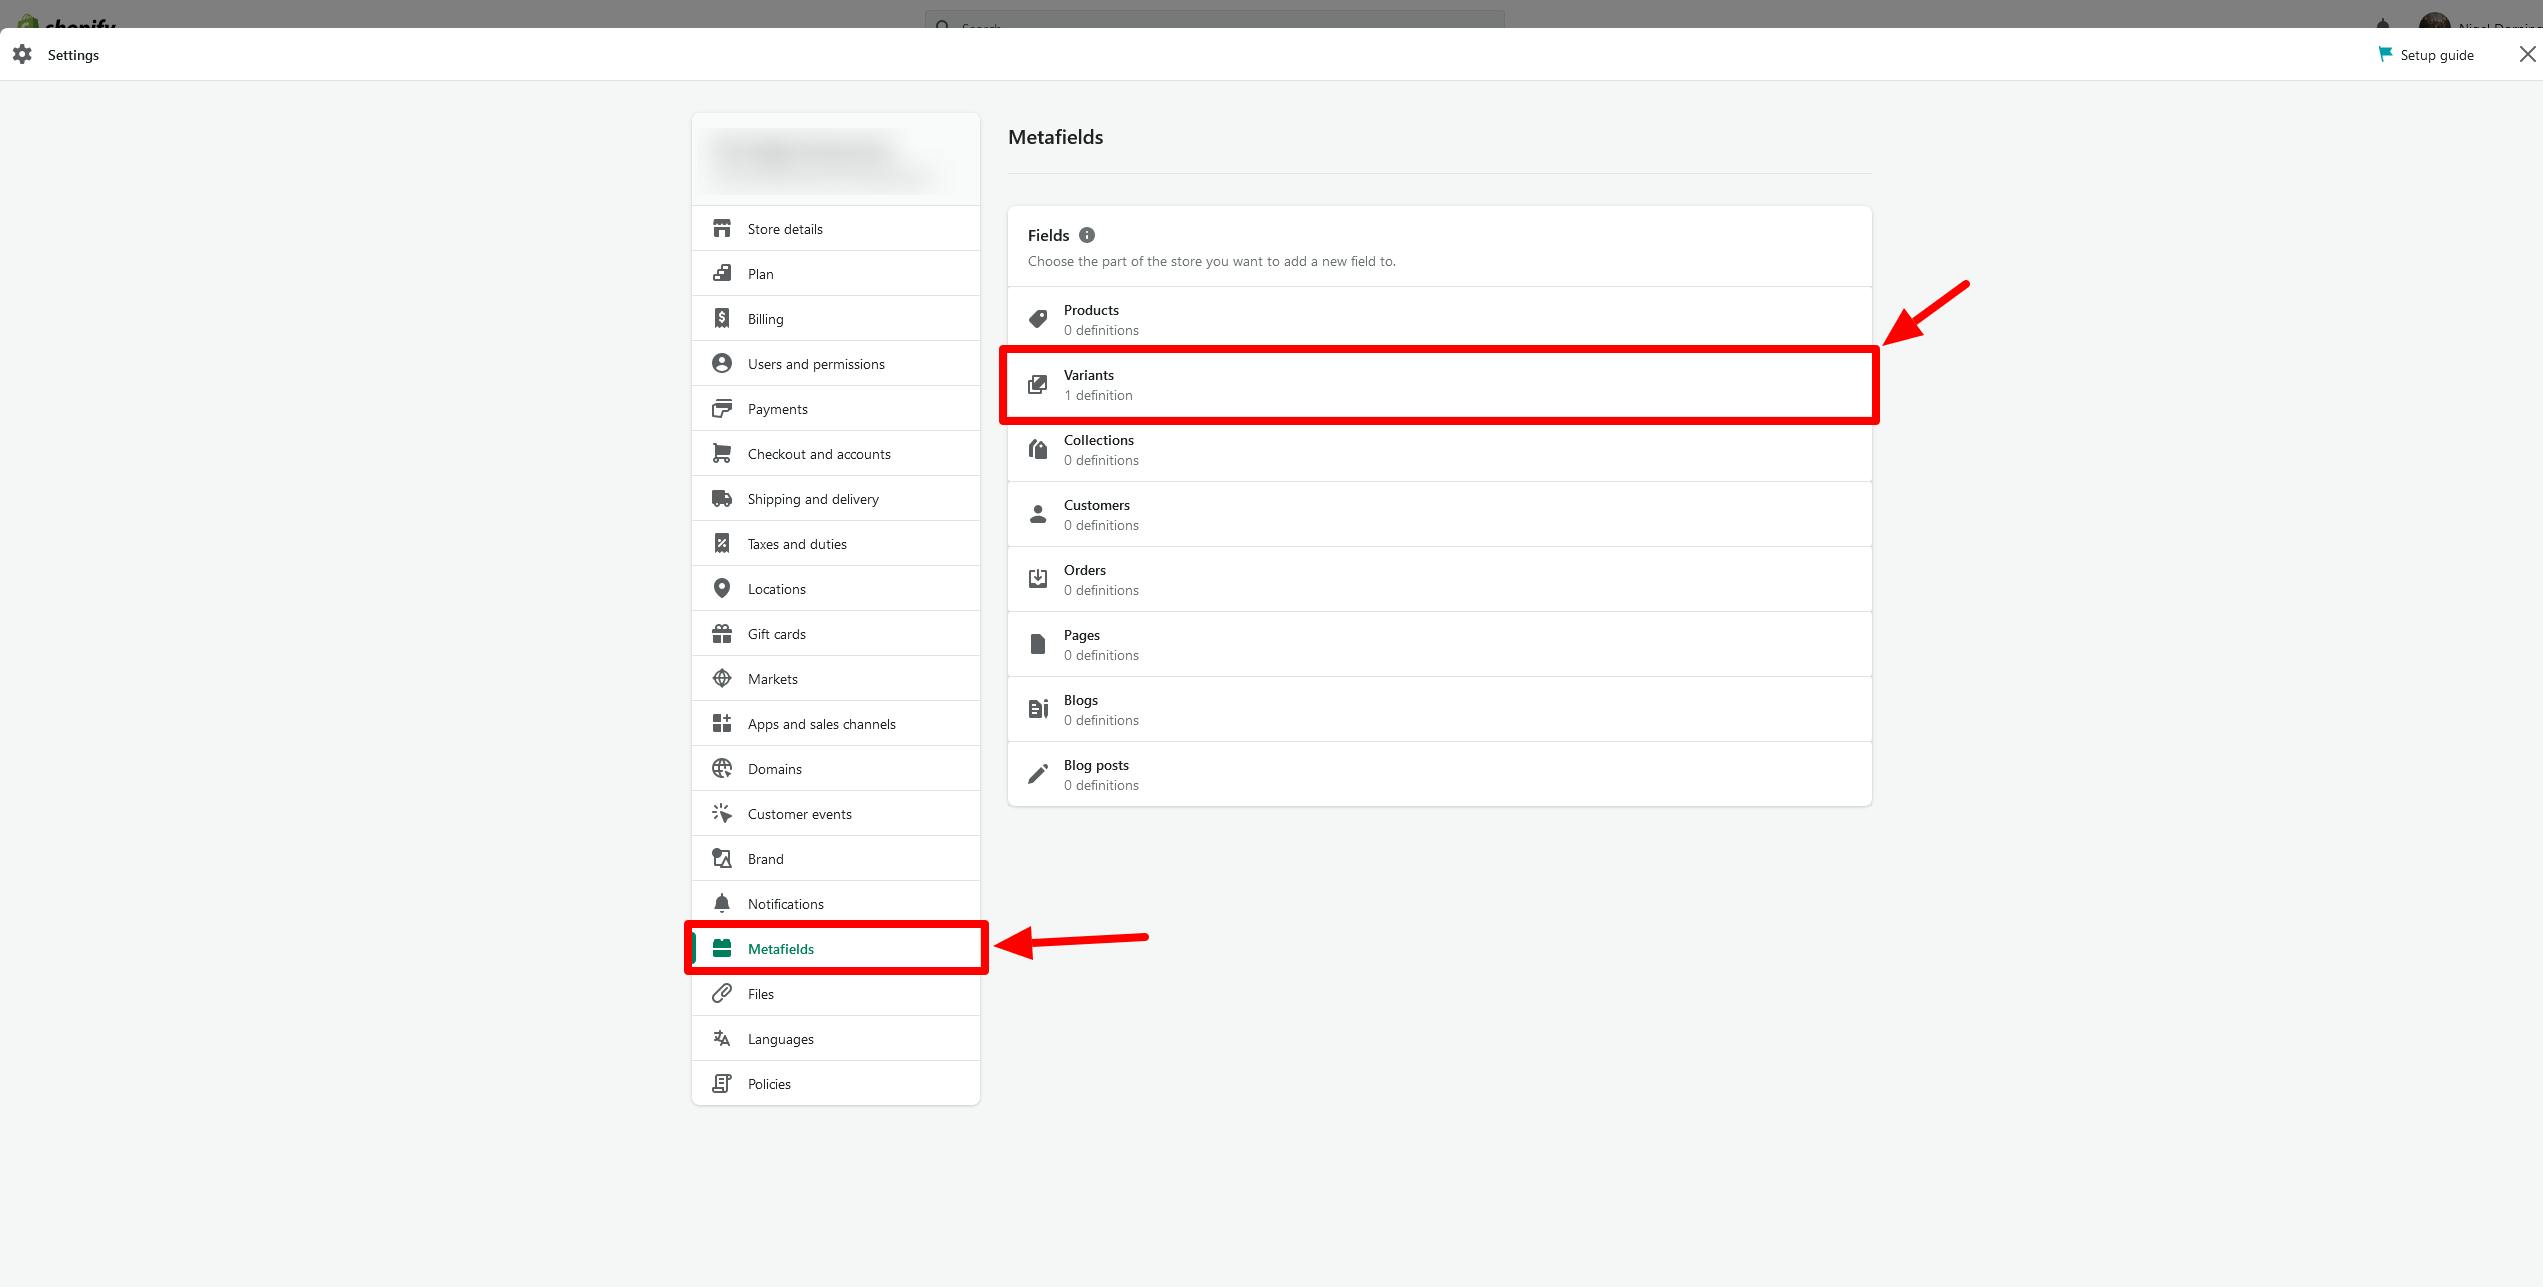
Admin setup
To start with go to settings in the bottom left corner of the admin screen, select metafields from the menu on the left and then click variants.
Then click the add definition button on the following page.
Enter the name you want to give the metafield, and then set a namespace (this is how we will access the metafield value later on). For the content type option choose the colour picker.

After adding the metafield to variants go to a product and select the options checkbox. When this is selected you will be able to set an option name and values.
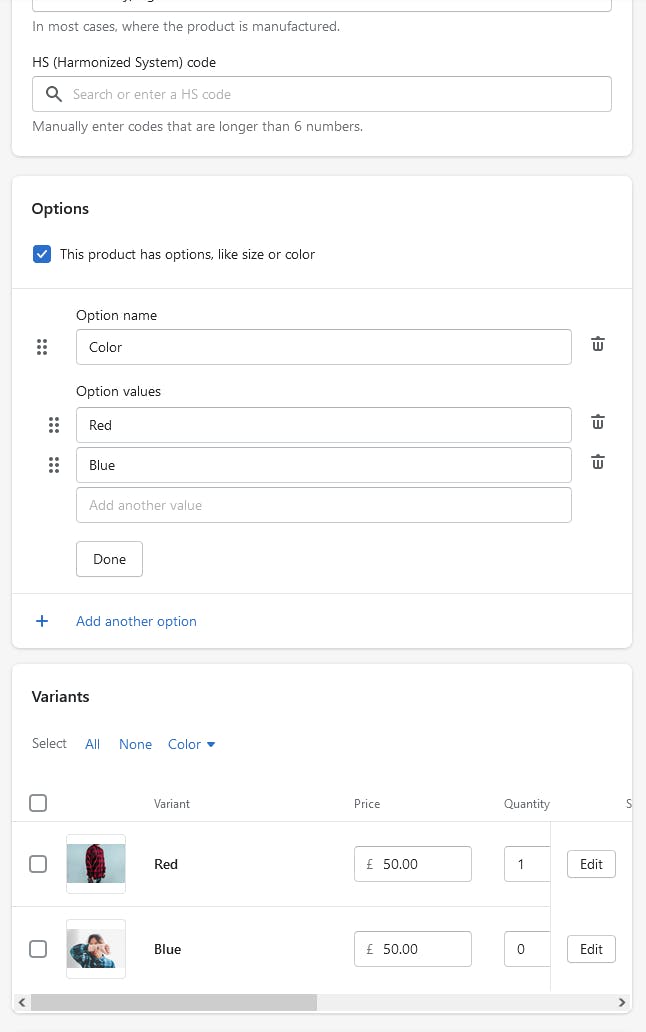
Once you have provided some options make sure to set a featured image on each variation. Then click the edit button.
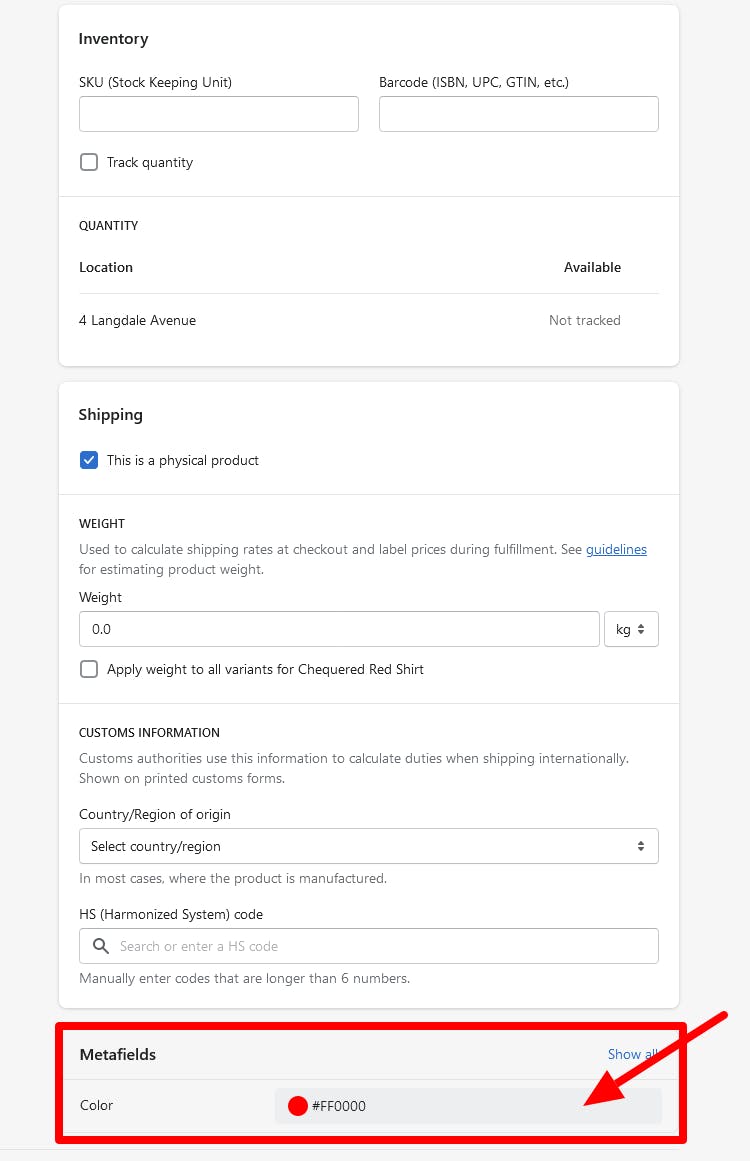
Scroll down until you can see the metafields, click on the input and select a colour value. This is the colour that will be displayed in the colour swatch.
Making the colour swatch
Next, go to your theme and in the sections folder create a section called main-product.liquid.
I've made a GitHub Gist for this section which you can see here. For this tutorial, I am just using Bootstrap to help make it look okay.
The main thing to look at is the form so I'll break it down a little bit.
Create a select element (this will be hidden with CSS) and loop through the product's variants.
<select name="id" id="variant-selector" class="visually-hidden mt-3">
    {% for variant in product.variants  %}
           <option value="{{ variant.id }}" {% if variant == product.selected_or_first_available_variant %}selected="selected"{% endif %}>
               {{ variant.title }}
           </option>
    {% endfor %}
 </select>
After this loop through the variants again but this time we will output each variant as a button.
Add a style attribute to the button and set the background property to be that of the metafields colour value.
Also, add data attributes for the variant's id and image which we will access using Javascript later.
<div class="swatches mt-3">
    <p class="mb-2">Colour</p>
        {% for variant in product.variants  %}
            <button
                type="button"
                class="btn swatches__colour"
                style="background: {{ variant.metafields.details.color }}"
                data-variant-id="{{ variant.id }}"
                data-variant-image="{{ variant.featured_image | image_url: width: 600 }}"></button>
        {% endfor %}
</div>
In the Javascript file for this section select the following three DOM elements: the product image element, the colour swatch buttons, and the select form element.
const productImage = document.querySelector('.main-product__image img');
const swatches = document.querySelectorAll('.swatches__colour');
const variantSelector = document.querySelector('#variant-selector');
Then loop through the colour swatch elements and apply a click event handler to each one.
Within the event handler set the value of the select field to the value of the buttons variant id data attribute. And then set the src attribute of the product image to the value of the button's variant image data attribute.
swatches.forEach(el => {
    el.addEventListener('click', () => {
        variantSelector.value = el.dataset.variantId
        productImage.src = el.dataset.variantImage;
    });
});
This will change the main product image to the variants featured image, and update the value in the variants select field to the chosen variants id so that Shopify knows what variant is selected.